¶ INTRODUCTION
¶ What is the portal?
The Portal is a web-based system that was created so that Intensive Residential Treatment (IRT) staff, the evaluation team, and Georgia Department of Behavioral Health and Developmental Disabilities (DBHDD) Office of Addictive Diseases (OAD) have one shared platform to track and visualize program data. IRT program staff will use the Portal to enter
data on all individuals referred, waitlisted, and/or admitted into the program.
¶ Purpose of the portal
The portal has two main purposes.
- Client record-keeping and case management support
Staff maintain accurate records of individuals referred, individuals admitted into and participating in the program, and individuals who discharge or transition back into the community after completing the program. Additional features such as 'Report an Incident' are built into the portal to communicate necessary information to DBHDD's program manager.
- Real-time data access and utilization
Different individuals have different information needs. The portal ensures all approved individuals (approved IRT staff, contracted evaluation partners, and DBHDD's IRT program manager) have access to reliable and accurate data that serves their information needs.
IRT staff access real-time data analytics through a dashboard built for their IRT site. Dashboards allow staff to select any date range and include metrics such as: # of new admissions, clients served, and distribution of referral sources. Additional features such as the resident profile will enable staff to customize and view a report for an individual resident in the program that includes relevant data points selected by staff.
DBHDD's IRT program manager has access to each site's dashboard and an
all-site dashboard customized for their standard and identified
information needs.
Evaluation partners at Georgia State university have access to the dashboards for each site, the aggregate all-site dashboard, and all program data to produce reports and respond to data requests. The evaluation team also works with the university's IT vendor to integrate new data into the dashboard feature as relevant.
¶ Portal Guide Objectives
The IRT Portal User Guide was created with the following objectives in mind:
Describe how the Portal is organized and how to navigate it
Describe the data entry tasks staff complete on an ongoing basis
Describe the features of the Portal that allow staff to monitor client
goals and outcomes
Describe how to access and start using the Portal
Describe and demonstrate how to perform data entry tasks
Describe and demonstrate how to use the portal to monitor client goals
and outcomes
Describe how often data should be entered and updated in the Portal
¶ GETTING STARTED
If you know your job will require you to access the Portal, your first
step is to request a new user account. In this section the guide will
walk you through requesting a new user account, activating your account,
and logging into the portal.
Once you have access to the portal, we invite you to read through the
entirety of the Guide while you have the portal open in a separate
window. As you read through The Guide, scroll through the various tabs
and sections of the Portal as they are described. This will allow you to
familiarize yourself with how the Portal looks and operates. When you
begin to enter data, you can reference this guide to navigate the data
entry process.
¶ Accounts
¶ How to Request a New User Account
To request a new account, go to the IRT Portal.
On the login page, select the Request Account link and follow the Account Setup and Password Guide.
¶ How to Log-In
Go to the IRT Portal.
On the login page, enter your site email address and and password, then select Login.
Don't have an account yet? Request one using the Account Setup and Login Guide.

¶ ORIENTATION TO THE PORTAL
This section will take you through the features of the portal and where
they can be found in the portal. It suggested that all new portal users
go through this section with the online portal open to orient to the
various section of the portal and the many data fields within each
section.
¶ Navigation toolbar
At the top of the webpage, you will see a green toolbar. This toolbar
displays your IRT site (e.g., Westcare Guidance Center) and the
following buttons: Report an Incident, Home, Dashboard, Help, a
magnifying glass, and your user account as Hello -- Name.
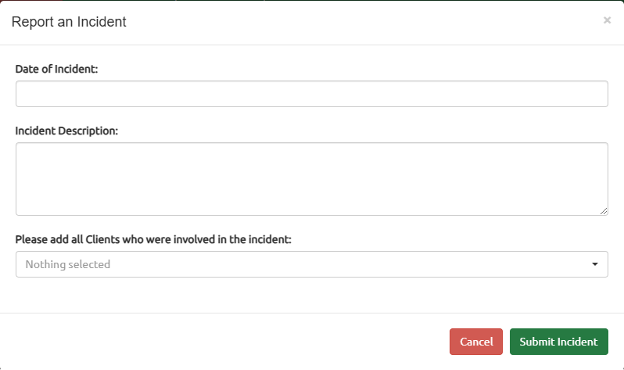
¶ Report an Incident

Use the Report an Incident feature
immediately whenever something unusual occurs at your IRT site or with
one of your site clients. As requested by DBHDD, always err on the side
of caution. If an incident has occurred that Kristal may need to know
about, use this button to enter the details of the incident (e.g., Date
of Incident, Incident Description, and all clients involved) and select
submit. If you are unsure, contact Kristal Davidson at
kristal.davidson@dbhdd.ga.gov.
¶ Home Page

When you log into the portal you are directed to the main home page. You
can click on the Home Page at the top of the webpage from anywhere in
the portal and be navigated back to this page. The home page is your
starting place for data entry. See below for more details.
¶ Home Page - Data Entry
The home page is where you will add a new record and begin data entry or
update information for existing records. The home page displays multiple
tabs: Referred, Admitted, Waitlisted, Discharged, and All Clients. You
can also access the calendar from this toolbar. These tabs will display
client records once data is entered.
For example, if an individual was referred and was not admitted into the
program, they will be on the Referred tab. If an individual was
admitted and is still a resident at your site, they will display in the
Admitted tab. The All Clients tab displays anyone with a record in
the portal regardless of their status (referred, admitted, waitlisted,
or discharged).
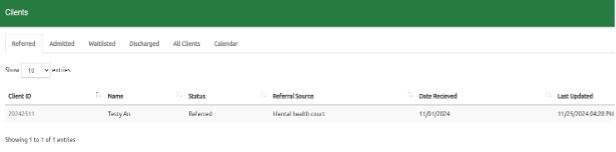
Upon selecting the tabs, you will be shown a list of clients
corresponding to each tab with descriptive information.
-
Referred/ Waitlisted: ID (Unique number, auto generated by the
portal), Client ID, Name, Status, Referral Source, Date Received, Last
Updated -
Admitted: ID, Client ID, Name, Status, Date of Admission, Last
Updated -
Discharged: ID, Client ID, Name, Status, Date of Discharge, Reason
for Discharge, last Updated -
All Clients: ID, Client ID, Name, Status, Last Updated
To search for a record within one of the tabs, use the search bar on
in the table.

¶ Dashboard
***The dashboards are under construction. Please stay
tuned.***
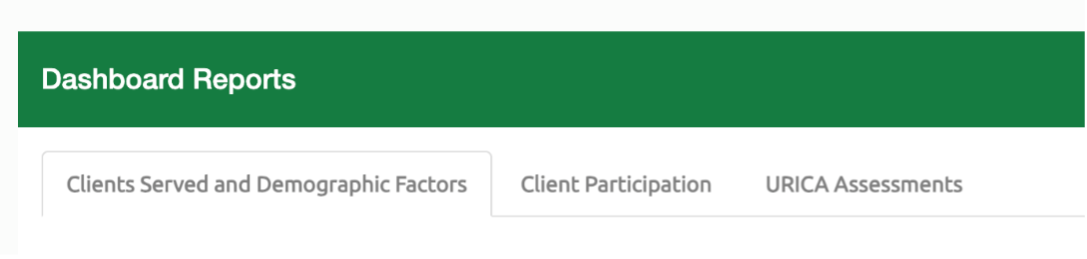
On the dashboard page you will find charts and graphs displaying metrics
such as clients served (i.e. number of clients served and referral
sources, client demographics like age, identities, gender), client
participation (i.e. number of admitted/discharged clients, reasons for
discharge, etc.) and URICA assessments administered as well as URICA
readiness scores among clients. Additional features will be built, such
as client profiles that allow you to customize and view data for
specific individuals.
The dashboards are built as interactive online tools. However, you can
also download these charts and tables as needed.
¶ Help
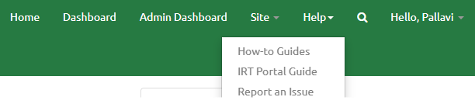
The help tab is where you find resources and support. This is where you
will be able to submit a ticket for technical support and access how-to
guides for navigating the portal.
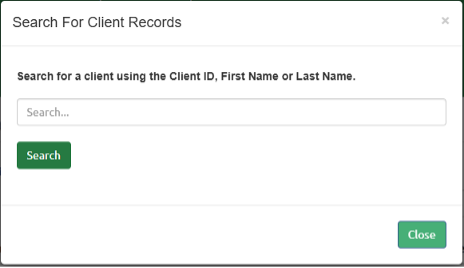
¶ Search Feature

Navigate to the magnifying glass icon to search for an existing client
record using a client's unique ID, first, or last name. The magnifying
glass is a global feature that will search your site's database for a
record. This is a necessary step before adding a new record to your
portal.
¶ PORTAL FEATURES - Data Entry & Data Visualization
The main features available to IRT staff in the Portal can be
categorized into three groups: Data entry, data visualization at the
client-level, and data visualization at the site level. Each of these
features is described in more detail below. If you are looking for more
information on how to use these features, visit How to Use the
Portal.
¶ Data Entry
The main responsibility of IRT staff in the Portal is data entry.
Without consistent and accurate data entry, the features that allow you
to visualize and analyze that data won't be very useful to you.
¶ Before Creating a New Client Record
Before creating a new client record in the Portal, confirm this person
does not have an existing record. Do this through the magnifying glass
search tool and enter their first and/or last name.

¶ Creating a New Record
All data entry takes place in individual client records. To orient
yourself to the specific data captured in the Portal, select Add New
Client located in the bottom left corner of the home page.
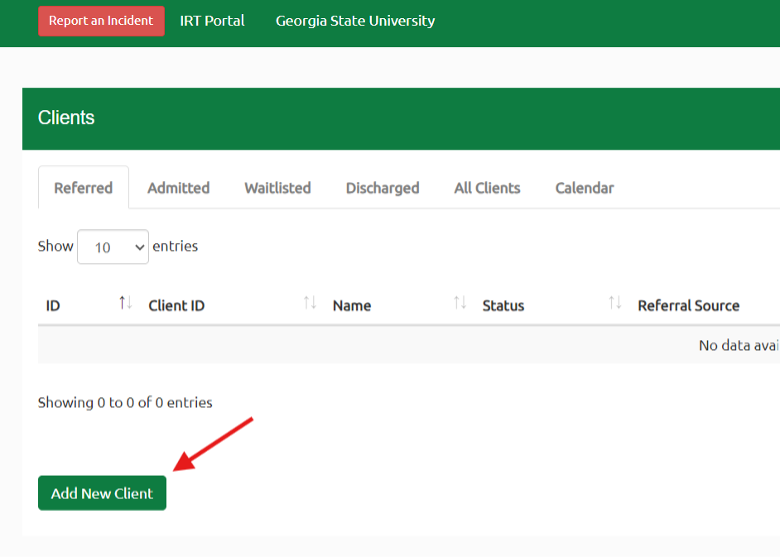
Once you select this button, you will see a
record open with tabs across the top that will capture information
relevant to this individual. This includes basic information about the
client, program details, their URICA assessments, and discharge
follow-up information. These sections are covered in the content that
follows, or you can select one to skip ahead.
¶ Basic Information and Demographics
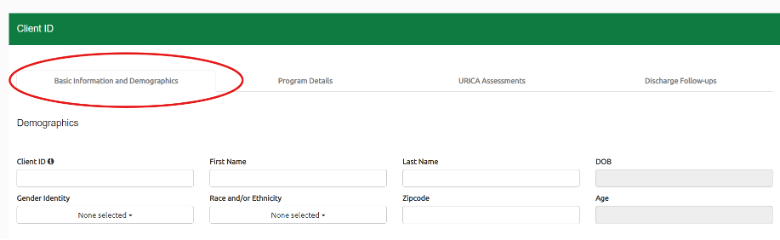
¶ Demographics
All fields in this section are required
-
Client ID - This field is assigned by the site staff. This
datapoint may be edited later (for the purposes of the sites who have
their agency-generated IDs available only when a client gets admitted
to the program). This is a required field. A small i beside "Client ID"
says "Before creating a new Client ID, search for the client on the
Home page using their First Name or Last Name to avoid duplicate entries." -
First Name - This is a required field.
-
Last Name - This is a required field.
-
Date of Birth (DOB) - Calendar function; This is a required field.
-
Gender Identity - Muti-select dropdown box; if an identity is not
listed as an option please select "Option not listed" and specify the
identity in the open textbox. This is a required field. -
Race and/or Ethnicity - Muti-select dropdown box; if Race and/or
Ethnicity is not listed as an option, select "Option not listed" and
specify Race and/or Ethnicity in the open textbox. This is a required
field. -
Age - This field is auto calculated using the DOB and current date.
This is a required field. -
Zipcode - It is associated with the residential address of a
client. This is a required field.
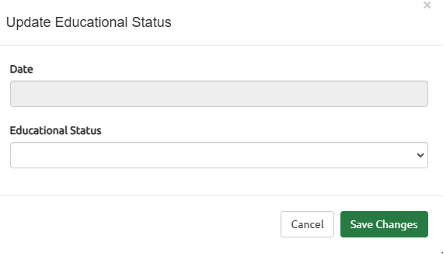
¶ Education
Educational Status- Upon clicking the "Update Status" button,
select the educational status from the dropdown list. Include the date
the educational status was collected or updated. Select the "Save
Changes" button.
If educational status changes, it can be updated. Include the date it
changed.
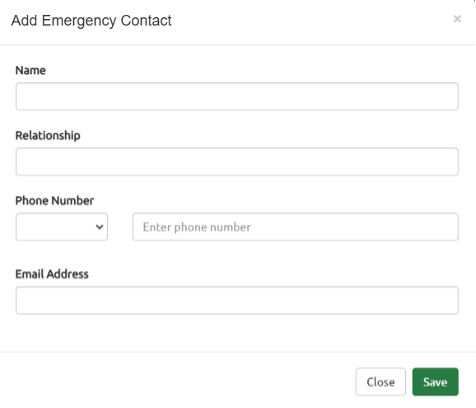
¶ Emergency Contact(s)
Upon clicking the "Add Contact" button, the "Add Emergency
Contact" box will pop up, prompting you to enter the information
(i.e., "Name," "Relationship," "Phone Number,"
"Email Address"). Select the "Save" button.
¶ Protective and Risk factors
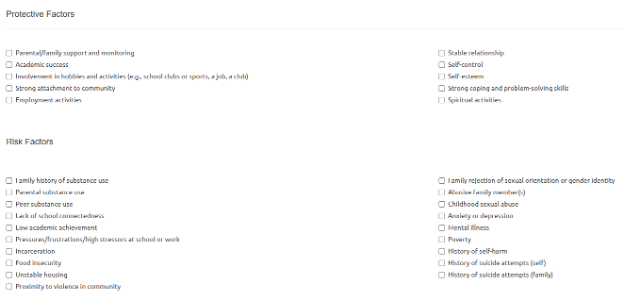
Protective and risk factors provide
context and provide insight into contributors that may impact their
experience in treatment, their substance use, and their overall health
and recovery. These protective and risk factors may or may not be within
a client's control.
Review the list carefully and select all that apply to the client by
checking the appropriate boxes. A client's protective and risk factors
may be learned as they progress through the program, these factors can
be updated in the portal when new ones are discovered.
[]{#Referral_Eligibility .anchor}Referral Eligibility
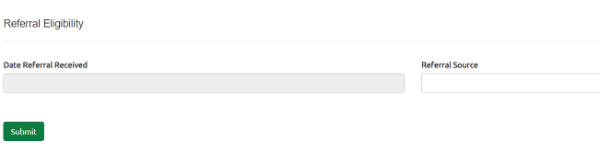
-
Date Referral Received- This field should reflect the date a
client referral was received. Use the format MM/DD/YYYY or choose the
date from the displayed calendar. This is a required field. -
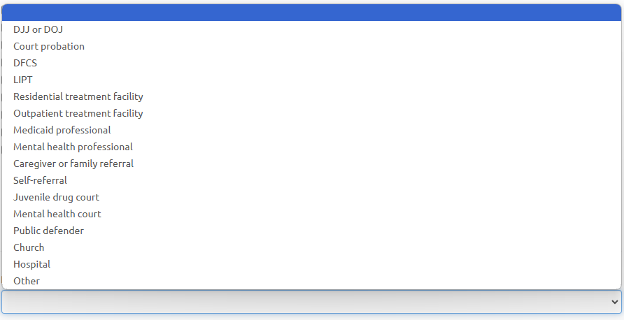
Referral Source- Select from dropdown menu; please indicate the
referral source- If referral source is not listed as an option, select
"Other" and specify source. This is a required field.
Submit

After entering all the required information in the "Referral
Eligibility" section, click the "Submit" button at the bottom
of the screen. This will save the client's information.
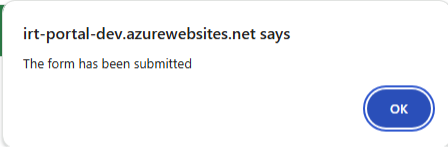
Once you click "Submit", a confirmation message will appear
stating "The form has been submitted".
To access this client's record in the future, navigate to the
"Referred" section on the portal's homepage. Clicking the
client's "ID" will open their record, where you can scroll to the
bottom of the page and then enter additional details on the "Client
Admission" section, such as "Date Referral Assessed for
Admission" and "Referral Eligible for Admission".
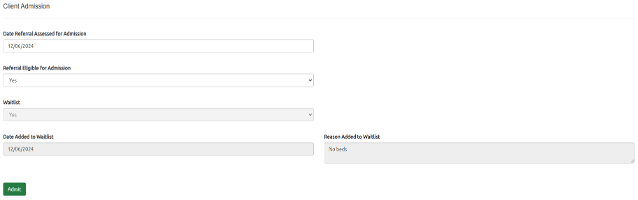
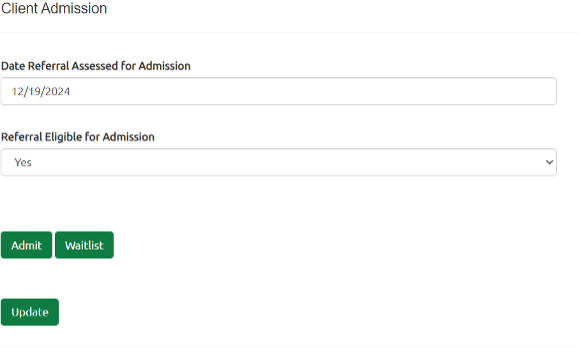
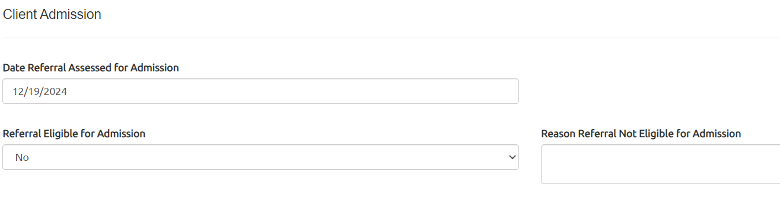
¶ Client Admission
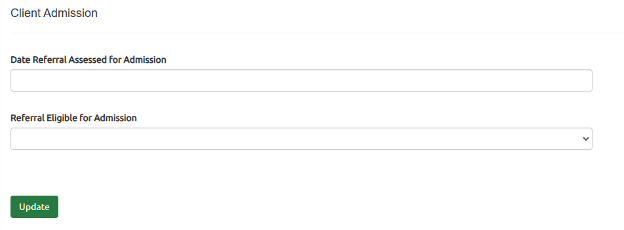
-
Date Referral Assessed for Admission- This field allows you to
enter the date when the client's referral was assessed for admission.
Use the format MM/DD/YYYY or choose the date from the displayed
calendar. This is a required field. -
Referral Eligible for Admission This dropdown menu lets you
indicate whether the client's referral is eligible for admission.
Select the appropriate option from the list (Yes/No). This is a
required field.
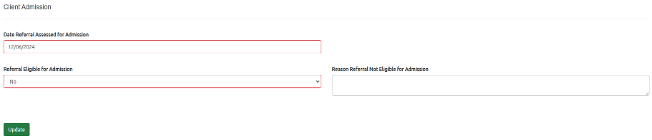
If you select "No" in the "Referral Eligible for Admission"
field, an additional text box appears where you can enter the "Reason
Referral Not Eligible for Admission". This is a required field.
If you select "Yes" in the "Referral Eligible for Admission"
field, two new buttons - "Admit" and "Waitlist" - will
appear at the bottom left of the screen.
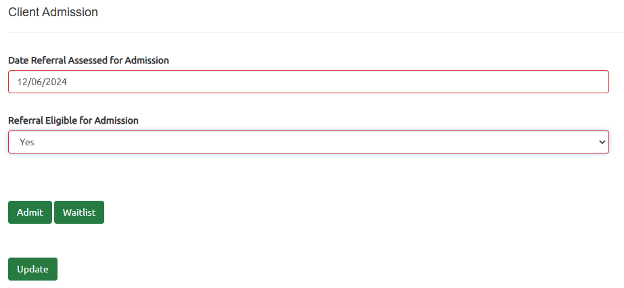
Follow the steps under the "Admit Client" or "Waitlist
Client" to depending on the action you are taking.
¶ Admiting or Waitlisting Clients
¶ Admit Client
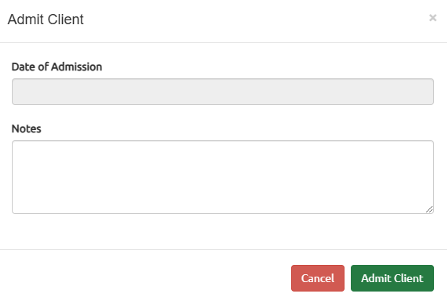
To admit a client, click on the "Admit" button. An "Admit
Client" box will appear on the screen and will prompt you to enter
the following information.
-
Date of Admission- This field allows you to enter the date when
the client is admitted into the IRT program. Use the format MM/DD/YYYY
or choose the date from the displayed calendar. This is a required
field. -
Notes- This is an empty textbox to add any additional information
related to the client's admission. This is a required field.
Once you have filled out the required information, click the "Admit
Client" button to confirm the admission. If you wish to do it later,
click the "Cancel" button.
Once you have filled out these fields, click the "Update" button
to save the changes to the client's record.
After clicking the "Admit" button, the client's record will shift
from the "Referred" tab to the "Admitted" tab on the
homepage. This allows you to easily track and manage the admitted
clients.
¶ Waitlist Client
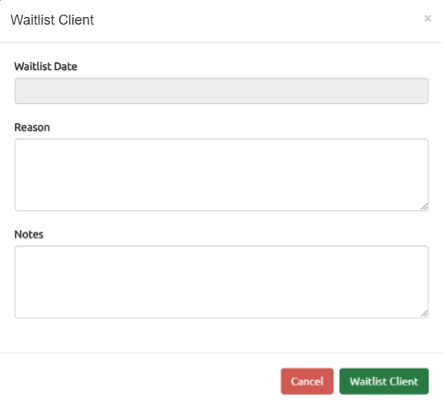
If you wish to waitlist a client, click on the "Waitlist" button.
A "Waitlist Client" box will appear on the screen and will prompt
you to enter information.
-
Waitlist Date- This field allows you to enter the date when the
client is placed on the waitlist. Use the format MM/DD/YYYY or choose
the date from the displayed calendar. This is a required field. -
Reason- This is an empty textbox to add any additional information
related to the reason for waitlisting the client. This is a required
field. -
Notes- This is an empty textbox to add any other notes or comments
about the client's waitlist status. This is a required field.
Once you have filled out the required information, click the
"Waitlist Client" button to confirm placing the client on the
waitlist. If you wish to cancel the waitlist action, click the
"Cancel" button.
After clicking the "Waitlist" button, the client's record will
shift from the "Referred" tab to the "Waitlisted" tab on the
homepage. This allows you to easily track and manage the waitlisted
clients.
¶ Admit a Waitlisted Client:
-
Locate the client's record under the "Waitlisted" tab on the
homepage. -
Click on the client's ID to open their record.
-
Scroll down to the bottom of the screen and you will see the
"Admit" button.
-
Click the "Admit" button. This will open the "Admit
Client" window. -
Follow the steps under the "Admit Client" section of
the guide.
Once you have filled out these fields, click the "Update" button
to save the changes to the client's record.
After completing these steps, you will notice the client's record has
now moved from the "Waitlisted" tab to the "Admitted" tab on
the homepage.
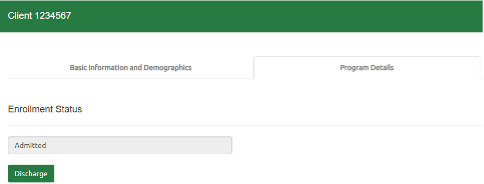
¶ Program Details
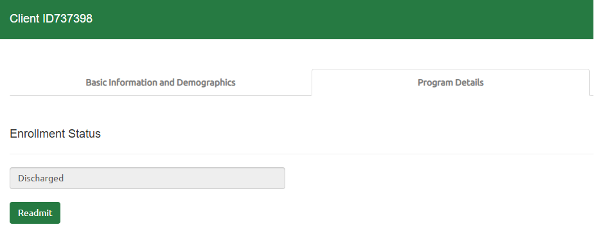
¶ Enrollment Status
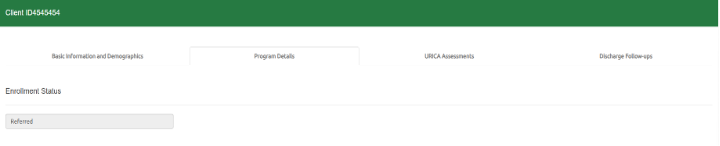
Enrollment Status shows the current status of the client
(Referred/Admitted/Waitlisted/Discharged).
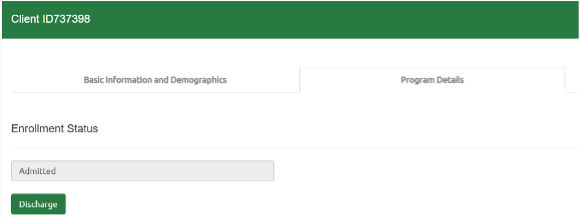
If you open the record of a client who is currently admitted to the
program, you will see a "Discharge" button under the "Enrollment
Status" section.
If you open the record of a client who has been previously discharged,
you will see a "Readmit" button under the "Enrollment Status"
section.
For more details on the steps to "Discharge" or "Readmit" a
client, follow the sections "How to Discharge an Admitted
Client" and "How to Readmit a
Discharged Client" respectively.
¶ Enrollment History
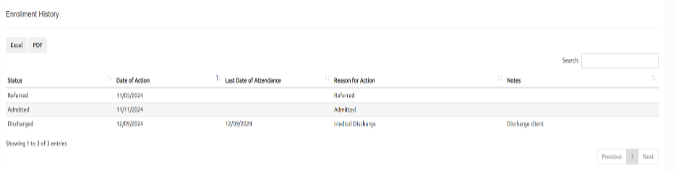
This section provides a chronological view of the client's enrollment
status over time, with the oldest events at the top and the most recent
at the bottom. You can see the following details:
-
Status- Indicates the client's current enrollment status
(Referred, Admitted, Discharged) -
Date of Action- Shows the date when the status change occurred
-
Last Date of Attendance- Displays the last date the client
attended the program (for Discharged status) -
Reason for Action- Explains the reason for the status change
(e.g., Referred, Admitted, Medical Discharge) -
Notes- Includes any additional comments or details about the
status change
Few points to remember -
-
History can be sorted by clicking the up and down arrows next to each
column header. -
You can search the history by Status, Date of Action, Last Date of
Attendance, or Reason for Action using the search bar at the top of
the section. -
The history can be exported to Excel or PDF formats for further
analysis if needed. -
You can navigate through multiple pages of enrollment history using
the "Previous" and "Next" buttons.
¶ Home Passes
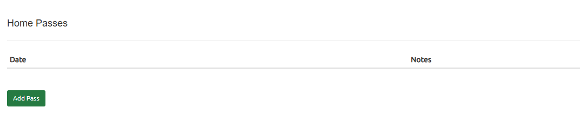
The "Home Passes" section allows you to keep a record of the dates
and related notes when a client is issued a "Home Pass" to visit their
home or family. This is a useful feature for tracking and managing a
client's time away from the facility.
To add a new home pass entry, follow these steps:
- Click the "Add Pass" button under the "Home Passes" section. A
"Home Pass Log" window will pop-upon the screen.
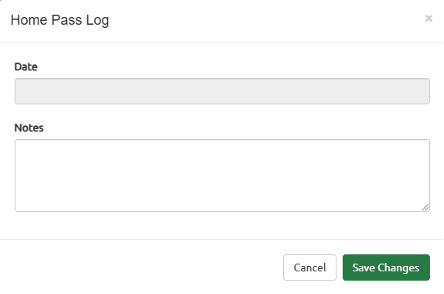
-
In the "Date" field, enter the date when the home pass was
issued. -
In the "Notes" field, provide any relevant information or
details about the home pass, such as the duration, purpose, or any
other important notes. -
Once you've filled in the necessary information, click the "Add
Pass" button to save the entry. Click "Cancel" to cancel the
entry.
The "Home Passes" section will now display a log of all the home pass
dates and their corresponding notes.
¶ Psychiatric Care
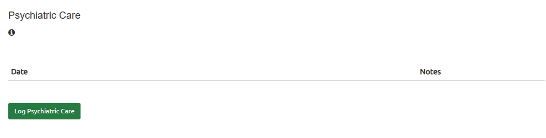
The "Psychiatric Care" section allows you to keep a record of the
dates and related notes when a client is given Psychiatric Care.
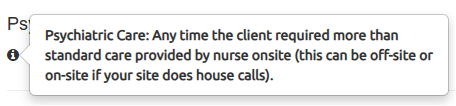
Hovering over the small "i" under the section header will give you the
exact indication on when to log the "Psychiatric Care".
To add a psychiatric care entry, follow these steps:
- Click the "Log Psychiatric Care" button under the
"Psychiatric Care" section. A "Psychiatric Care Log" window
will pop-upon the screen.
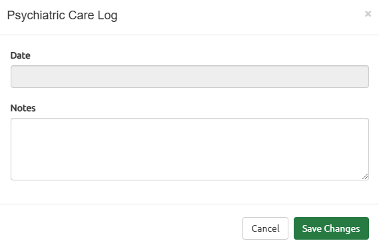
-
In the "Date" field, enter the date when the psychiatric care
was provided to the client. -
In the "Notes" field, provide any relevant information or
details about the care received. -
Once you've filled in the necessary information, click the "Save
Changes" button to save the entry. Click "Cancel" to cancel the
entry.
The "Psychiatric Care" section will now display a log of all the
psychiatric care dates and their corresponding notes.
¶ Medical Care

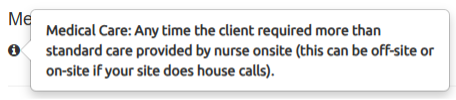
The "Medical Care" section allows you to keep a record of the
dates and related notes when a client is given Medical Care. Hovering
over the small "i" under the section header will give you the exact
indication on when to log the "Medical Care".
To add a medical care entry, follow these steps:
- Click the "Log Medical Care" button under the "Medical
Care" section. A "Medical Care Log" window will pop-upon the
screen.

-
In the "Date" field, enter the date when the medical care was
provided to the client. -
In the "Notes" field, provide any relevant information or
details about the care received. -
Once you've filled in the necessary information, click the "Save
Changes" button to save the entry. Click "Cancel" to cancel the
entry.
¶ Save Form
To save all the changes made under the "Program Details" tab for a
client, click the "Save Form" button
¶ URICA Assessments
The URICA assessment is used to evaluate a client's readiness for
change across different stages of the recovery process at intake, and to
assess their action and maintenance sub-scores at reassessment and
discharge.
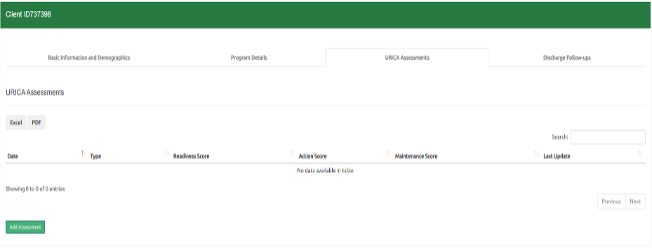
The "URICA Assessments" landing page
holds the history of the client's URICA (University of Rhode Island
Change Assessment) assessments entered to date allowing you to view the
client's scores over time. The data can be sorted by clicking on the
column headers, and you can search for specific assessment entries using
the search bar at the top of the section.
The key information displayed in this section includes:
-
Date- The date when the URICA assessment was conducted.
-
Type- intake, follow-up, or discharge.
-
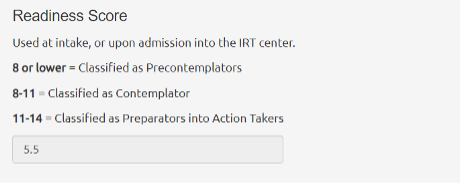
Readiness Score- A score that indicates the client's overall
readiness for change.-
8 or lower -- pre-contemplators
-
8-11 -- contemplators
-
11-14 -- preparators into action takers
-
-
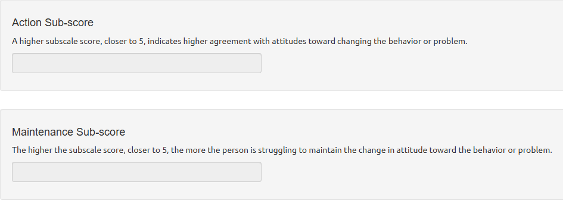
Action Score- A score that reflects the client's stage of change
and their willingness to take action.- A higher action score indicates higher agreement with attitudes
toward changing the behavior or problem.
- A higher action score indicates higher agreement with attitudes
-
Maintenance Score- A score that measures the client's struggle to
maintain changes.- A higher action score (closer to 5) indicates the person is
struggling to maintain the change in attitude toward the behavior or
problem. Conversely, a lower score indicates less struggle.
- A higher action score (closer to 5) indicates the person is
-
Last Update- The date when the assessment data was last updated.
¶ Add URICA Assessment
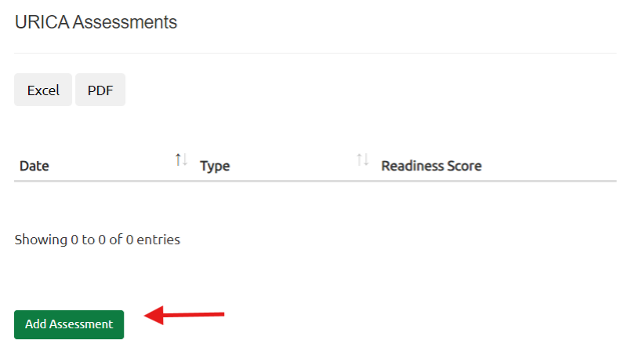
Navigate to the "URICA Assessments" tab within the client's record.
Click the "Add Assessment" button at the bottom left of the URICA
Assessments section. This will open the "URICA Assessment" window,
which displays the client's ID at the top left.
Select the assessment type (intake, reassessment, or discharge) and
complete the remaining fields.
-
Assessment Type- It is a dropdown box. Select the appropriate
option based on when the assessment was conducted - Intake,
Reassessment, or Discharge. This is a required field. -
Date of Intake- It auto populates the date when the client was
admitted to the program. -
Date of Assessment- Select the date when the URICA assessment was
conducted. This is a required field. -
Domain Key- This section provides a legend for interpreting the
URICA assessment scores, with 1 representing "Strongly disagree" and
5 representing "Strongly agree."

¶ URICA at Intake
For URICA intake assessments, the client will respond to 24
questions that are used to determine their 'readiness for change'
score.
- Select the appropriate response using the "Domain Key" for each
question with 1 indicating strongly disagree to 5 indicating strongly
agree. All 24 questions are required.
Once you have filled out all the necessary information, click the
"Save" button to record the URICA Assessment. You will see the
client's readiness score at the bottom.
You can also click "Cancel/Delete" to discard the assessment or
"Back" to return to the previous screen.
Note- You can also find a "Download" button at the top right of the
screen. By clicking the "Download" button, you can choose to export
the assessment data as a PDF document.
¶ URICA Reassessment
For URICA reassessment, choose the "Reassessment" option from the
"Assessment Type" dropdown.
-
"Date of Intake" will automatically populate with the date the
client was admitted to the program. -
Enter the date when the URICA Assessment was conducted under the
"Date of Assessment" -
You will notice that only a subset of the 24 URICA questions are
asked at reassessment (Q2, 4, 8, 10, 11, 12, 15, 18, 20, 21, 23 & 24). -
Select the most appropriate response to each question using the domain
key for each statement. -
The system automatically calculates the "Action Sub-score" and
"Maintenance Sub-score". -
Click the "Save" button at the bottom of the form once all the
fields are filled out.

¶ URICA at Discharge
For URICA at discharge, choose the "Discharge" option from the
"Assessment Type" dropdown. Enter the remaining fields.
-
"Date of Intake" will automatically populate with the date the
client was admitted to the program. -
Enter the date when the URICA Assessment was conducted under the
"Date of Assessment" -
You will notice that only a subset of the 24 URICA questions are
asked at reassessment (Q2, 4, 8, 10, 11, 12, 15, 18, 20, 21, 23 & 24). -
Select the most appropriate response to each question using the domain
key for each statement. -
The system automatically calculates the "Action Sub-score" and
"Maintenance Sub-score". -
Click the "Save" button at the bottom of the form once all the
fields are filled out.
¶ Discharge Follow-Ups
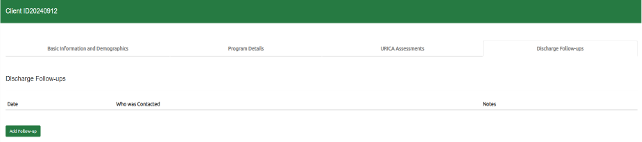
To add a Discharge Folow-up for a client, navigate to the "Discharge
Follow-ups" tab of the client record and click on the "Add
Follow-up" button at the bottom left of the screen.
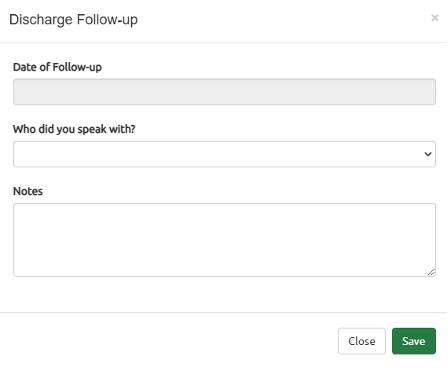
A "Discharge Follow-up" window will pop up. Complete the following
fields:
-
Date of Follow-up- Select the date when the follow-up was
conducted. This is a required field. This is a required field. -
Who did you speak with? Select the individual contacted during the
follow-up from the dropdown menu. This is a required field. -
Notes- Empty textbox; add any relevant details about the
conversations/outcomes in this field. This is a required field.
Once all fields are completed, click "Save" to record the follow-up.
¶ Data Visualization
FORTHCOMING: please stay tuned for information about the Portal's
Dashboard section.
¶ HOW TO USE PORTAL
¶ How to Access Client Data
All data entry you perform in the Portal will take place within
individual client records. Therefore, you can access a client's record
by clicking on a client's record. To search for a client record, click
on the magnifying glass icon in the upper right-hand corner of the home
page and type the youth's Youth ID, first, or last name. Unlike the
search tool within the enrollment status tabs, a search for a youth
using the magnifying glass icon will return a youth record irrespective
of their current enrollment status.
¶ How to Enter Data
When you are ready to begin entering client data this section will walk
you through the steps of creating a new record. This begins with
entering basic information and referral data. From there you have the
option to admit the client or waitlist the client when relevant.
¶ How to Add a New Referral
At the bottom of the client list, select Add New Client button:

Complete the Basic Information and Demographics tab and then click
Submit button at the bottom of the screen:

Once submitted, navigate to the Home page to find the saved client
information under the "Referred" tab.
¶ Enter Admission Eligibility of a Referred Client
Enter the eligibility for admission data. If you are creating a new
client record, this will be at the bottom of that page. Or, if you
already created a record for a referral and are returning to update the
record with eligibility data, navigate to the referral tab of the
homepage and select the client record. Enter the required data fields at
the bottom of the page.
If client is eligible for admission, you can go ahead and admit them if
they are being admitted into the program, waitlist them, or simply
select the update button to keep their record as eligible without
admission and without waitlisting.
If the client is not eligible, you will be prompted to enter a reason
they were determined ineligible.
Refer to the section and follow the steps under the "Referral
Eligibility" of the guide if you need more
help.
¶ How to Admit a Referred Client
If the referral is eligible for admission, you will have the
option to admit them using the "Admit" button and completing the
necessary fields. Please refer to the section and follow the steps under
the "Admit Client" of the guide. If they are not
admitted into the program, keep them as a referral.
¶ How to Waitlist a Referred Client
If the referral is eligible for admission but there is no vacancy
or it requires you to place them on a waitlist for any other reason*,*
you have the option to select the "Waitlist" button and complete the
necessary fields**.** Please refer to the section and follow the steps
under the "Waitlist Client" of the guide if you need
more help.
¶ How to Admit a Waitlisted Client
For admitting a waitlisted client, you'll select the client record from the
Waitlist tab of the homepage.
From there you will have the option at the bottom to admit them using
the "Admit" button. Please refer to the section and follow the
steps under the "Admit a Waitlisted lient"
of the guide for more help.
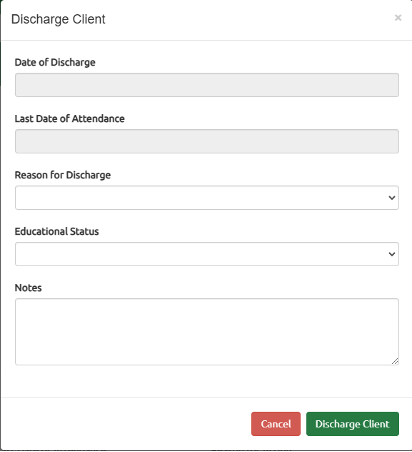
¶ How to Discharge an Admitted client
Navigate to the "Admitted" tab or "All Clients" tab and find
the client you want to discharge. Select their client "ID" which
will take you to their information.
Navigate to the Tab labeled "Program Details" under the
"Enrollment Status" header, you will find the "Discharge" button.
Click the "Discharge" button and input the information prompted
(i.e., "Date of Discharge", "Last Date of Attendance",
"Reason for Discharge", "Educational Status"
(at the time of discharge) and "Notes"), when finished select
"Discharge Client". Click "Cancel" button to stop the action.
Note that all these fields are required.
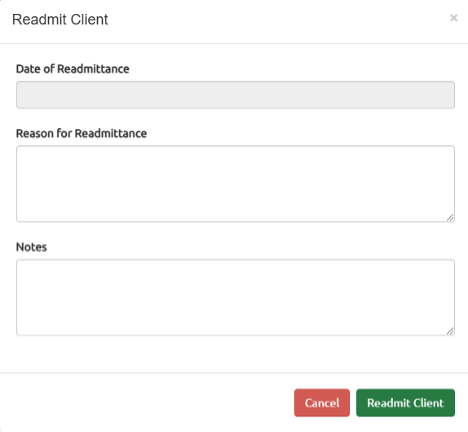
¶ How to Readmit a Discharged Client
Navigate to the "Discharged" tab or "All Clients" tab, and
find the client you want to readmit. Select their client "ID"
which will take you to their information.
Navigate to the tab labeled "Program Details" under the
"Enrollment Status" header, you will find the "Readmit" button.

Click the "Readmit" button and input the information prompted
(i.e.,"Date of Readmittance", "Reason for Readmittance"
and "Notes"), when finished select "Readmit Client".
Click "Cancel" button to stop the action**.**
Note that all these fields are required.
¶ How to Use the Dashboard
The dashboard is under construction. Please stay tuned for more
information and guidance when it is available online.
¶ How often should I enter data?
You should enter data into the portal regularly to ensure accurate
tracking of all client records. This includes clients who have
been referred, admitted, waitlisted, discharged, or readmitted.
Use the portal to record discharge follow-up, URICA Assessments,
view dashboards, report incidents, or seek help when needed.
¶ Help and Troubleshooting
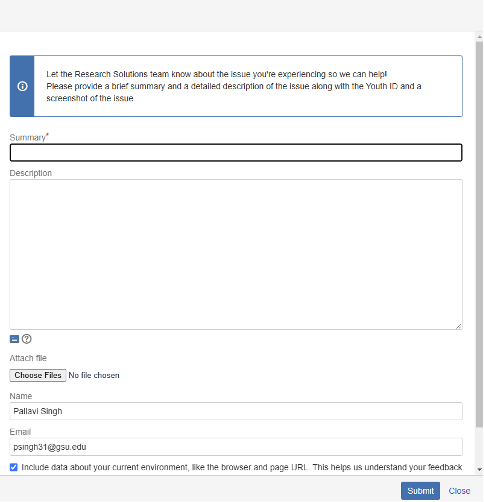
¶ How to Request Help
If you need help or technical assistance that cannot be
addressed with the how-to guides, you can submit a ticket
to Research solutions for help. Find and select the "Help"
button in the toolbar and the top of the webpage. From help
select "Report an Issue". Once selected a window will pop
up to submit a help ticket to Research Solutions.
¶ How to Reset your Password
To reset your password, follow the Account Setup and Login Guide.
¶ How to Deactivate a User Account
To deactivate an account, send a request via email to the Research Solutions Team at researchsolutions@gsu.edu with the name and username for the account.
The team will manually deactivate the account and respond via email when the account has been successfully deactivated.